There seems to be a lot of confusion about adding HTML sitemaps to Shopify websites, so we created this article to show you how simple it really is. Most people think they have to resort to using a 3rd party app (which usually charge a monthly fee), however, that is not the case. In this post we’ll explain, step by step, how to create a Shopify HTML sitemap in less than five minutes.
Yes, it’s really that simple.
 What is an HTML Sitemap?
An HTML sitemap allows website visitors and crawlers (such as Google Bot) to easily navigate all the pages throughout the website on one page. It’s essentially a bulleted text version of the website’s navigation. The anchor text displayed in the HTML sitemap links directly to the page it references.
What is an XML Sitemap?
XML sitemaps are very similar to HTML sitemaps as they list a websites’ important pages, ensuring Google (or any other search engine crawler) can locate, crawl, and understand the structure of the website – which plays an integral part in organic search rankings. However, XML sitemaps are usually dynamic and pulled from a 3rd party plugin, such as Yoast SEO. These sitemaps are also the ones you submit to Google Search Console for indexing, which allows you to monitor technical website issues.
How to Create a Shopify HTML Sitemap
The first thing you need to do is create a new template where you will add some custom lines of code. To create a new template in Shopify, follow these steps:
- From your Shopify admin panel, navigate to Online Store > Themes
- In the first section (Live theme) click Actions > Edit Code
- Under the Templates folder, click Add a new template
- Select page from the dropdown and name it sitemap
- Click the Create template button
This is the template where you are going to add some custom code. It’s very important to add the code directly below the line with {{ page.content }}, which will ensure you don’t lose any styling from a normal page.
To list out all of your products and collections, add the following code to your new template page:
<div class="row">
<div class="col-md-6">
<h2>Collections</h2>
<ul>
{% for c in collections %}
<li>
<a href="{{ c.url }}">{{ c.title }}</a>
</li>
{% endfor %}
</ul>
</div>
<div class="col-md-6">
<h2>Products</h2>
<ul>
{% for product in collections.all.products %}
<li>
<a href="{{ product.url }}">{{ product.title }}</a>
</li>
{% endfor %}
</ul>
</div>
</div>
Note: this code is wrapped with some bootstrap code so you’ll have to edit the div classes if you’d like to show this in two separate columns.
Now that the template has been created, you need to add a new page to host the sitemap. To create a new page in Shopify, follow these steps:
- From your Shopify admin panel, navigate to Online Store > Pages and click the Add page button in the top right corner
- Add the page title Sitemap but leave the content section empty
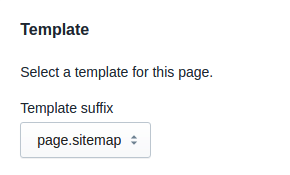
- From the Template section on the right-hand side of the page, select page.sitemap
At last! Your sitemap page has been created, so the first thing you should do is check it out. You can do this by clicking View page.
For any other questions, please contact us. Have a great day!

 What is an HTML Sitemap?
